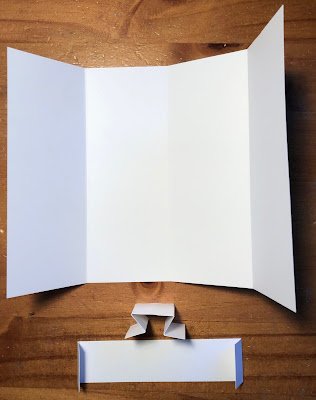
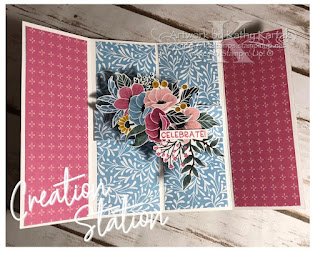
1. Score the long side of an 8-1/2″ by 5-1/2″ Thick Basic White Card Stock base at 2-1/8″, 4-1/4″, and 6-3/8″.
2. Cut a 1″ by 5-1/8″ Thick Basic White Card Stock strip for the “bendy” part. Score at 1/2″ at each end.
3. Cut a 1″ by 3″ Thick Basic White Card Stock strip for the “wobble.” Score at 1/2″, 1″, 2″, and 2-1/2″. Fold this piece accordion style so it looks like an upside down picnic table.
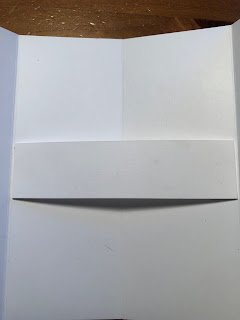
4. Use Tear & Tape or Seal+ Adhesive to adhere the “bendy” to the center of the card base, about 1/16″ inside the score line.
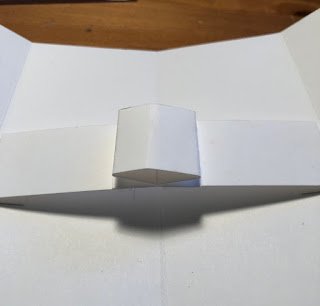
5. Use Tear & Tape or Seal+ Adhesive to adhere the “wobble” to the center of the “bendy.”
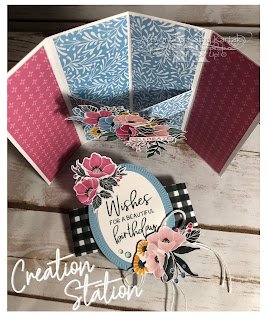
Now it’s time to decorate your card!
6. Choose your Designer Series Paper for the four panels inside the card and the two panels on the outside of the card. Cut each of these to 2″ by 5-3/8″. Before you adhere these to the card, make sure they fit–you may need to trim them a tad. Adhere the DSP strips to the four inside and two outside panels, slipping the two innermost panels under the “bendy.”
7. Choose DSP to cover your “bendy arms.” Cut two pieces to 1″ by 1-7/8″ and adhere.
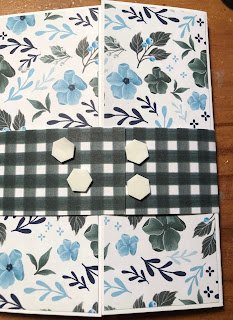
8. To make the belly band, cut a 1-1/2″ by 9-1/4″ strip of DSP. Wrap around the closed card and fold gently at each side. Use Seal or Seal+ Adhesive to adhere the ends.
9. Create your front sentiment piece and adhere it to the belly band with Stampin’ Dimensionals applied to the belly band (not to the sentiment piece).


Leave a Reply