#staminup #faithfulinkspirations #creationstation Welcome to the February 2017 round of the Creation Station blog hop! This month we’re having a birthday bonanza! I know you will be inspired by the awesome creations our design team is sharing. I’m always awed and inspired!
My projects today are interactive. Lately, I’ve been using the great birthday stamp sets and accessories from the Occasions catalog to make loads of birthday cards. But since our design team is here to inspire you, I thought I’d step it up a bit. I hope you like what I’ve done. If you do, I’d be thrilled if you’d leave me a comment.
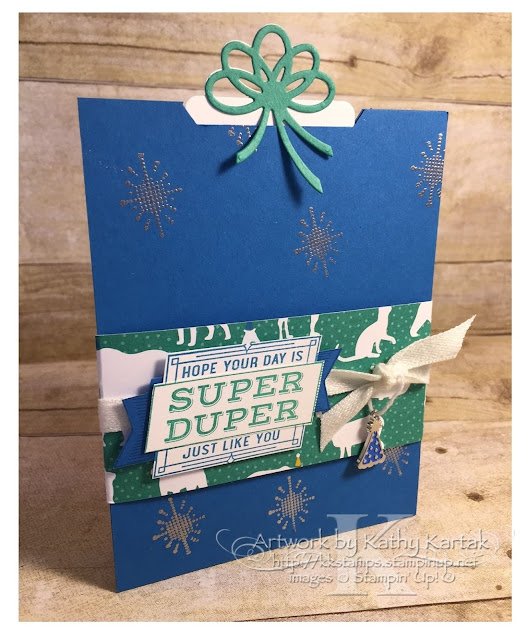
My first card is a pocket card and it was super duper easy to make!! It uses the “Super Duper” stamp set and accessories from the Party Animal Suite.
I started with a half sheet of Pacific Point Card Stock, cut lengthwise. Since this is a pocket card, the fold is at the bottom. I stamped the fireworks designs in Versamark on the front of the card, added some Silver Stampin’ Emboss Powder, and set it with my Heat Tool. I punched a slot at the top of the card with the Classic Label punch and used Tear & Tape on the side and top of the card to seal the pocket.
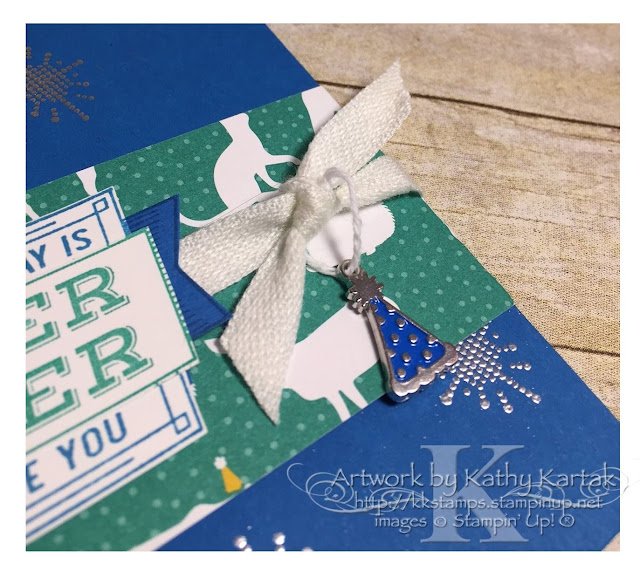
The belly band is made by scoring a 2″ by 10″ piece of Party Animal Designer Series Paper at 2-7/8″ and 7-1/8″ and wrapping it around the card. I also tied a length of Whisper White Ribbon from the Succulent Garden Ribbon Combo Pack around the belly band. I threaded a piece of Whisper White Baker’s Twine through one of the Party Animal Embellishments and tied it in a loop. I tied this loop into the Succulent Garden Ribbon knot, so the party hat swings freely.
I stamped the sentiment three times. First, in Emerald Envy onto a Whisper White scrap. Then, in Pacific Point onto a Whisper White scrap. And, last in Pacific Point onto a Pacific Point scrap. I fussy cut the elements and then adhered them back together. The sentiment assembly is adhered to the belly band with Stampin’ Dimensionals.
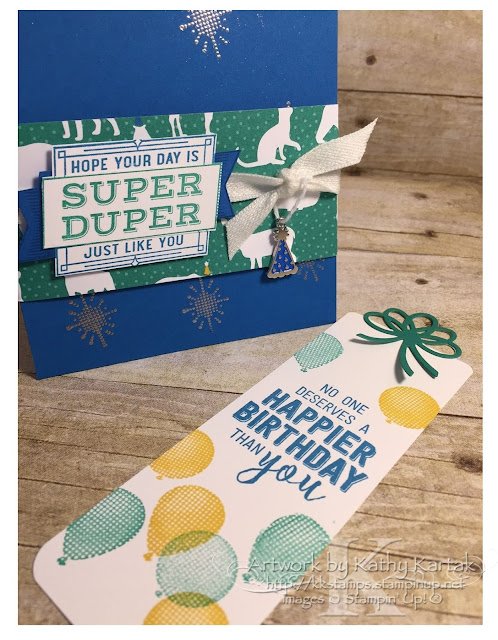
For the inside, I used one of the Balloon Pop-Up Thinlits dies to make a bow at the top of a 2″ strip of Whisper White Card Stock. I used the matching thinlit to cut a bow from Emerald Envy Card Stock, which I glued to the top of the strip with the Fine-Tip Glue Pen. I didn’t adhere the ribbon ends, so that they can hang over the card when the tag is inside.
I stamped a sentiment from the “Balloon Adventures” stamp set in Pacific Point as well as balloons from the “Super Duper” set in Emerald Envy and Crushed Curry, onto the tag. And I rounded to bottom corners with the Corner Rounder Punch. Super duper cute, right?
My next card is NOT super-duper easy. I’m not gonna lie: you will need to fuss around with it to get it to lie right. Just know that you will need to make a prototype first, so that you can work out the kinks, OK? (You’ve been warned!)
I haven’t used the Pop of Pink DSP since the annual catalog first came out. It’s my favorite DSP in the catalog because I love, love, LOVE the Melon Mambo, Basic Black, Whisper White color combo!
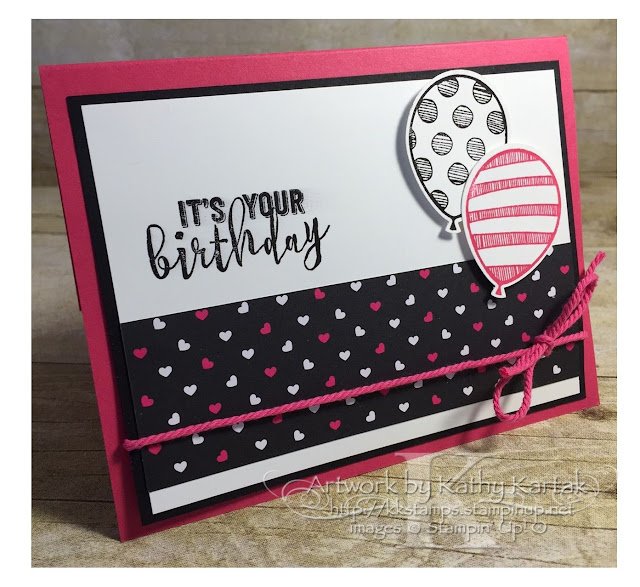
I started with a Melon Mambo Card Stock card base. I stamped a sentiment from the “Balloon Adventures” stamp set in Basic Black Archival Ink onto a 3-3/4″ by 5″ piece of Whisper White and then set it aside to dry for about 5 minutes before moving on. (That’s an important step–ask me how I know!) Once it was dry, I added a 1-1/2″ by 5″ strip of Pop of Pink DSP and then adhered it to a 3-7/8″ by 5-1/8″ Basic Black mat. I tied a length of Melon Mambo Thick Baker’s Twine around the mat before using Stampin’ Dimensionals to adhere it to the front of the card base.
I stamped one of the balloons in Basic Black onto a Whisper White scrap and (having learned my lesson, set it aside to dry before I) punched it out with the Balloon Bouquet punch. I stamped another balloon in Melon Mambo and punched it out with the same punch. I adhered these to the front of the card with Stampin’ Dimensionals.
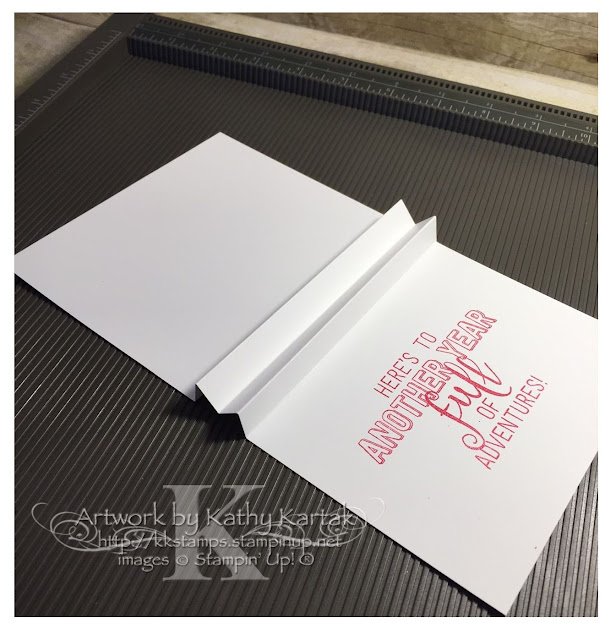
For the inside of the card, I started with a 5-1/8″ by 10″ piece of Whisper White Card Stock and used my Simply Scored Board to score it at 4-1/8″, 4-5/8″, 5-1/8″, 5-7/8″, and 6-1/8″. (NOTE: You will likely need to trim this piece when you adhere it to the the inside of the card. Just sayin’.) You’ll need to accordion-fold this piece so that it forms the letter M (see picture). I stamped a sentiment from the “Balloon Adventure” stamp set onto the inside of the card.
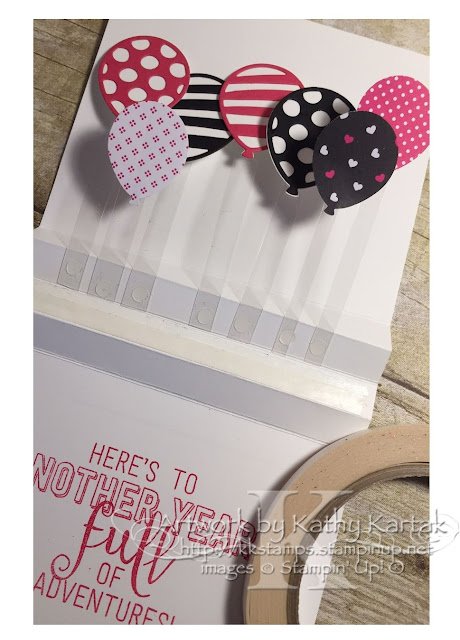
Next, I punched a few balloons from the Pop of Pink DSP with the Balloon Duet Punch. I punched some Whisper White Card Stock balloons, too. I also used the Balloon Pop-Up Framelits to cut balloon elements from Melon Mambo and Basic Black Card Stock. I adhered these to the Whisper White balloons with the Fine-Tip Glue Pen.
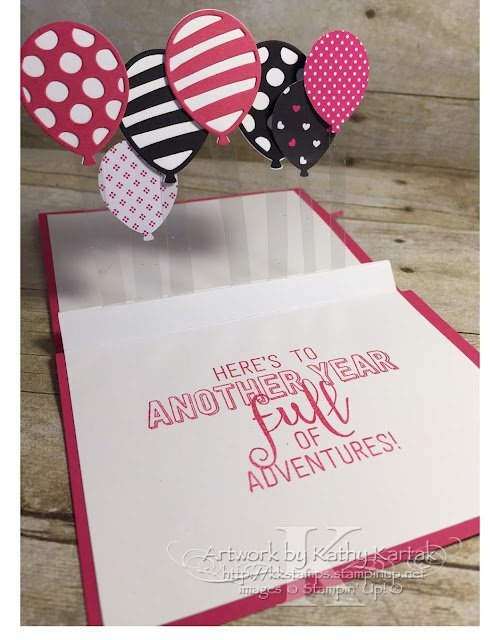
I cut several 1/4″ strips of Window Sheet and adhered these strips to the back of the balloons with Glue Dots. I snipped the ends of the Window Sheet strips so that the balloons’ heights were varied. I adhered them to the inside of the M with glue dots. When the balloons were all in place, I sealed the M shut, using Tear & Tape.
And through a little jiggering, a little resetting, a little trimming (and a little cussin’), I adhered the Whisper White piece to the inside of the card. I think it turned out super duper cute, even through a bit of frustration. (Make a prototype before you try this at home!)
Now onto the next stop on Creation Station. Please use the “back” and “next” buttons to navigate around to be awed and inspired! See you next month!
Product List
Product List



Loving your card with the pull out tag/bookmark. You're right — it is super duper cute.
Love both your bookmark 3D and your awesome balloon pop up card ! TFS
Such fun cards Kathy! I really like the pocket card! I'm never thinking outside the box – just used to regular A2 cards– think I'll give this a shot!
Oh Kathy, I love the effect of the balloon card suspended on acetate … very clever x
Love how you created that card with the balloons in the center! WOW. Great projects.
I know this so late in the game, but, could you Please explain a little better how you made your Pocket card base? I understand your pop-up card, but the slider pocket has me shaking my head!