#stampinup #faithfulinkspirations #creationstation Let’s hear it for the boys! This month, our design team will be showing you projects for the men in our lives. I have plenty of men in my house! I remember way back 26 years ago when my first son was born. I was ecstatic to have a child–something I wasn’t sure was going to happen, ever. But those post-pregnancy hormones got to me and I well remember that time when I was in the shower, crying because I was the only girl in the house. “Even the cat is a boy!!” I wailed. Yeah, I got over myself pretty quickly! (Thankfully, 5 years later we were blessed with twins: another boy and a girl!!)
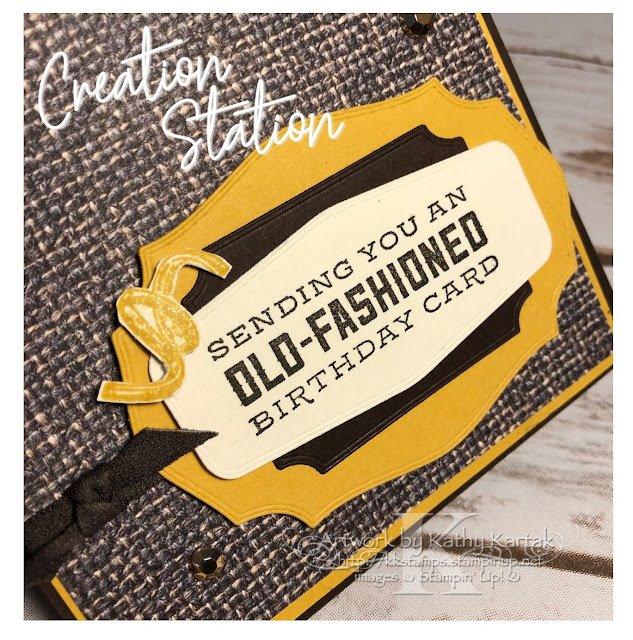
When I saw the “Whiskey Business” stamp set in Stampin’ Up’s new annual catalog, I squealed with delight! My husband–a man after my own heart–is a big whiskey drinker. This is the perfect set for him! I expedited my first order from the new catalog, so the stamps would get here in time for today’s hop. I made him a super special birthday card (and I’m actually early ’cause his birthday is later this month)!
I used loads of new products from the new catalog. On the front, I started with a 4-1/4″ by 5-1/2″ Early Espresso Card Stock card base, cut lengthwise. I adhered a 4″ by 5-1/8″ piece of In Good Taste Designer Series Paper to a 4-1/8″ by 5-3/8″ Bumblebee Card Stock mat. I wrapped a length of Early Espresso Faux Suede Trim around this and then adhered everything to the front of the card.
Next, I stamped a sentiment from the “Whiskey Business” set in Early Espresso Ink onto Very Vanilla Card Stock and cut it out with one of the Tasteful Labels Dies. I also used these dies to cut a label from Bumblebee Card Stock and a different one from Early Espresso Card Stock. I used Stampin’ Dimensionals to add the sentiment piece to the card. I stamped the citrus twist in Bumblebee Ink onto Very Vanilla Card Stock and fussy cut it with my Paper Snips. I added some Clear Wink of Stella to this piece before adhering it to the sentiment piece with a Mini Stampin’ Dimensional. Finally, I added three Gilded Gems to the front of the card.
The inside is where the fun happens! I made a pop-up!!
This pop-up is super easy to do. I cut a piece of Bumblebee Card Stock to 3-3/4″ by 10-1/2″. I scored this at 4-1/2″, 5-1/2″, and 6-1/2″. The 5-1/2″ score mark lines up with the center fold of the card base and is a “mountain” fold. The other two are “valley” folds. I adhered the bottom of the Bumblebee piece to the bottom of the card base first, so that I could make sure everything aligned. I added two 3″ by 4″ pieces of the same DSP as the front of the card, one to the top and one to the bottom.
I made a sentiment piece with the Tasteful Labels Dies, just like the one on the front and even added another citrus twist.
I used Watercolor Paper for the decanter and whiskey glasses. First, I used a Water Painter to lay down a Bumblebee Ink wash. PROTIP: I let this dry for quite a while and even finished the drying with my Heat Tool because I used Early Espresso Ink to stamp the images and if the Watercolor Paper was still wet, the classic ink would spread (#askmehowiknow). I used my Paper Snips again to fussy cut the decanter and glasses and used Stampin’ Dimensionals at the bottom of each piece to adhere them to the front of the pop-up section of the card.
I hope you enjoyed my project. I am so pleased with how it turned out and I know my hubby will enjoy receiving it for his birthday (especially if it accompanies a bottle of whiskey)!
Next up is the fabulous Denita Wright-Smee. She always inspires me with her creations. I know she’ll inspire you, too!
Product List


Love, love, love your card. Great idea with that fun surprise pop-up!
Can't wait to get this set to CASE your creation! Love it!
This is gorgeous!! I am going to case this card for my brother. He will love it!!!
That is really nice to hear. thank you for the update and good luck. lunettes de soleil homme bottega veneta